Last month’s newsletter was some thoughts about our favorite metal – Aluminum. This month we are going to talk about OD threads. This topic came from Robert C. from Megger. Thanks Robert!
Any part that needs to have a nut fastened to it, or thread directly into some other part or assembly, will need to have OD threads machined onto it. More than likely this will be a turned part, but it isn’t uncommon to also see a milled part with OD threads. There are definitely some ways to make this type of feature more cost effective than it might otherwise be.
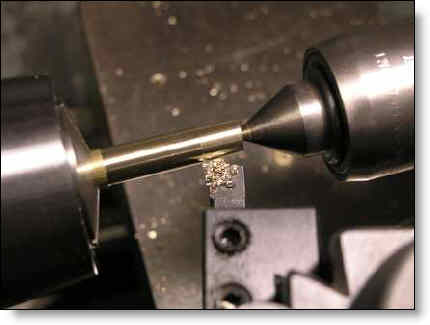
Keep the thread length to a minimum that you need for your design. As with internal threads, the cost rises as you lengthen the threads due to increased time and chance for troubles with longer threads. Whether the threads are turned on a lathe, or thread milled on a CNC mill, the longer they are, the more likely that the machinist will experience deflection while machining the threads which can lead to the thread class being out of spec. If you can keep your thread less than 3x the diameter, there is a good chance it won’t be much of a factor. But if the threads are longer, as the material deflects away from the cutting tip, the tool cuts less and the threads will be too big. The end of the shaft being threaded will deflect the most so the condition may exist where the threads are too large at the end of the shaft and too small at the base. The machinist may resort to all sorts of solutions including changing the G-code to accommodate the deflection so that it cuts a “tapered” thread to try to compensate for the deflection and end up with a straight thread. There are other potential solutions to tapered threads such as using a live center in the end of the part. See Figure A for what a live center looks like. If this is intended to be used, then the part would need a feature designed on the end to accept this center. A standard center drill will leave the right type of feature for a live center. Centerdrills come in many different sizes which you can see here. On a CNC turning center that has a sub-spindle (a secondary spindle facing the opposite direction from the main spindle), the sub-spindle can be used to support the part for turning or threading to minimize deflection. Fewer shops have these types of machines, so it isn’t advisable to design your part with this requirement. For an OD thread in a milled part, the use of a live center would not be possible.

Figure A: Live Center to Support Turned Part.
Once you have your thread length optimized there are a few other considerations to keep in mind. Many OD threaded features end just before a shoulder. There needs to be enough clearance for the threading tool to not hit the shoulder as it finishes machining the base of the thread. The amount of clearance is dependant on the size of the threading tool. At a minimum, the center of the last thread can’t be more than half of the width of the threading insert. This is assuming you are using a CNC turning center, not a manual lathe. So we advise at least 1.5 to 2x the pitch. If you are really tight on space, please consult with your shop for advice on the bare minimum for your specific application.
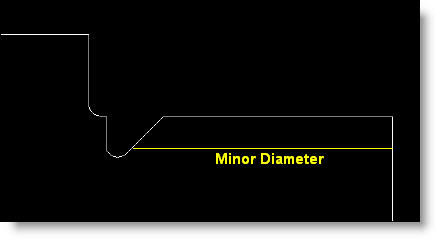
It is also a good idea to have a thread relief groove at the base of your threads. Although it isn’t necessary when using a CNC machine, it helps with deburring and will also allow a not to fully seat against the shoulder. Our recommendation for a thread relief is to have it just deeper than the minor diameter of the thread and to have a 45 degree lead in with rounded corners at the base. This will not only allow an OD finish turning tool to create the feature, but it will be stronger with radii at the base rather than having sharp corners. By eliminating the need for a separate grooving tool, you can eliminate a tool change and some machine time. This isn’t the only way to go, but one that we have found works well. See Figure B. For thread relief at the base of a thread milled part this type of feature isn’t possible and we recommend either no relief or just a simple groove which can be put in with a key seat cutter.

Figure B: Thread Relief at base of OD turned threads.
For milled parts, thread milling is the most effective way to put the threads on. There are single-point tools which cut just a single thread per pass around the post, or multi-point tools which can machine multiple threads at once. Try to use a thread size and pitch which is readily available. You can ask your shop or use a resource like MSC to find different sizes of thread mills.
Trying to be consistent with other newsletters, we would also recommend that you use the lowest thread class possible, and allow for a generous lead in on the front of the thread. If you follow these simple rules, you should have success with lower cost threaded parts.
We welcome your comments below.
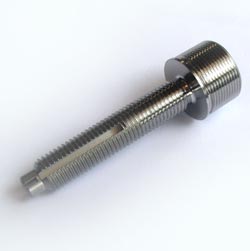
Every month we feature a really cool part that we have made. May’s Part of the Month is a machined part which has two different threads, both which go up to a shoulder. You can see that there is good thread relief.


