Last month’s newsletter discussed bilateral vs unilateral tolerances. This month we are going to cover a fairly simple topic – countersinks, chamfers and the tolerances of these types of features.
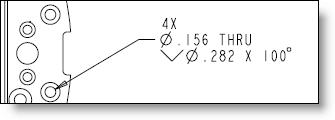
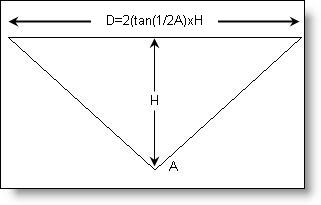
Any machined part that has holes in it probably also has countersinks. Countersinks are used as a lead-in for threads, for flathead screws, and just as a general edge break or chamfer on any type of hole where a lead-in is necessary. In many cases, the diameter of a countersink is not very critical and can often be dimensioned at a lower tolerance than the standard tolerances for the part. Unfortunately, we see all too often that the diameter tolerance is left as a 3 decimal place dimension which would assign a higher tolerance than is needed – generally ±.005″. See Figure A. Normally that much tolerance is no problem for CNC machining. So why would this drive additional cost vs. a lower tolerance feature? There are a few reasons why this is a special case. Generally a countersink feature is specified as the diameter of the outer edge and the included angle. This feature is machined with a countersink tool and the Z-depth of the tool will determine how large the countersink is. If you recall back to your days of high school trigonometry, with a 90º included angle on the tip of the tool, for every .001″ change in Z-depth the diameter will change by .002″. See Figure B. With a 100¡ or 120¡ tool the condition is further exacerbated – .001″ of movement with a 120º tool equates into .0034″ change in diameter. So to hold ±.005″ on diameter, the Z-depth of the tool needs to be held to ±.0015″ which is not easy to do.

Fig. A: Expensive countersink callout.
Even high quality countersink tools are notoriously unreliable on the dimension from their tip to X diameter along their cutting edge. This makes dialing in the tool more challenging the first time and after any tool replacement. Any additional time adds costs to the part. The higher tolerance that you need to hold the diameter to, the longer it will take to dial it in, and the more closely it will need to be watched while running the parts.

Fig. B: Diameter vs Depth relationship.
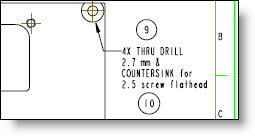
If the countersink is being used for a flathead screw, it might be possible to make the tolerance looser, possibly by removing a decimal place as shown in Figure C. In this example, the countersink tolerance with one decimal place is .5mm or approximately ±.020″: a very generous and inexpensive tolerance. If you need to ensure the fastener head is not proud, then make the countersink a little deeper. To really ensure it is never proud, put that exact note on the drawing and specify the part number of the fastener that will be used. Having a “GO” gage is always a positive and quick way to check a feature.

Fig. C: Inexpensive countersink callout.
For machined chamfers that are not on holes, consider the use of the feature and tolerance it accordingly. Again, many engineers forget to loosen the tolerance and the shop is stuck dealing with a more challenging feature and overprocessing the manufacturing; ultimately, the customer is stuck paying for it.
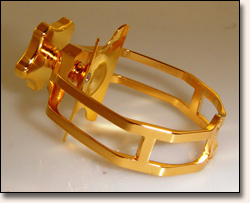
Every month we feature a really cool part that we have made recently. July’s Part of the Month is this beautiful saxophone mouthpiece ligature. It is a bit of a pat on our own back, as this is a part of our own design and sold under our own Theo Wanne brand. Two months ago Pro CNC and Theo Wanne Classic Mouthpieces merged in order to seamlessly work together and make the worlds best saxophone mouthpieces and accessories.


