Last month’s newsletter discussed title block tolerances. This month we are going to look at another case study like the ones we did back at the end of 2009 and beginning of 2010.
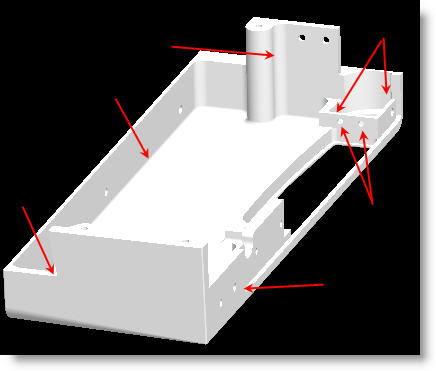
The expression “The proof is in the pudding” has never been more applicable than with this part here in figure A. We received a batch of 4 parts to quote that all belonged to a production order that our customer needed to place. When we looked closely at the parts it was apparent that there was a lot of opportunity to reduce the cost with some good DFM (Design For Manufacturability) work. We gave our customer a price quote for the parts, and indeed they did not meet the price target they needed to achieve their profit margin. So we went to work optimizing the features to improve the machinability – or with one feature, we made it possible to machine. These are relatively high volume parts, with as many as 2,720 parts needed over a two year period. This one part below is one example of the package and one which saved over 20% of the cost with just a small investment of time.

Figure A: Part before DFM.
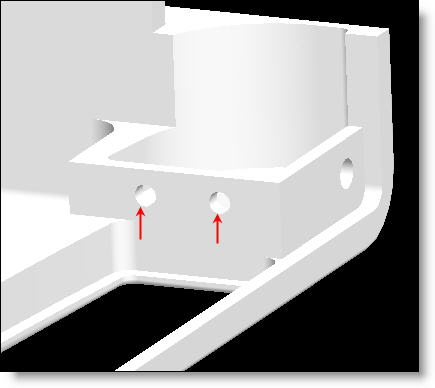
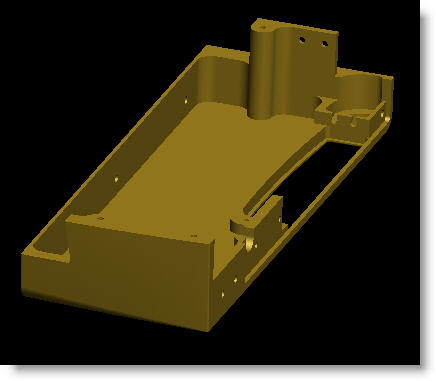
This part is about 14″ long and requires a fair amount of material removal from the back side with a relatively small endmill. It wasn’t a terrible situation with a L/D(length/diameter) ratio of over 5:1 for the tool, but still worth addressing. We increased the radii to not only allow a larger diameter endmill with a 3:1 ratio, but also made the radius about .010″ larger than the cutter radius. This offers a better surface finish in the corners because of reduced chatter while subsequently allowing the endmill to move faster through the corners. We redesigned some holes (see Fig. B) which would have been nearly impossible to machine; the changes allow them to be machined with a spherical endmill rather than using some sort of drill jig or very small 90 degree angle head. We optimized a corner radius on one end, allowing the use of a tapered dovetail tool and saving an entire operation. We also increased some other small corners to be larger, and the corresponding part that fit in the pocket was also increased. This detail also took weight out of the overall assembly because the material added in this aluminum part, was removed from the stainless steel part which fit inside.

Figure B: These holes can’t be accessed from either side.
This part already fit very nicely into a standard size of bar stock and didn’t need any adjustments to save money on the raw material. It is about .05″ less than a 2.5″ wide bar stock which is a good amount to ensure the sides clean up, but not so much that you spend a lot of time roughing away excess material. The fact that the customer also allows the use of bar stock instead of cut plate offers a big savings right there. They did a good job specifying the material in a cost effective manner.

Figure C: Part after DFM saved lots of time.
With the work that was done on this part, the unit price was reduced by around $20 which adds up to huge savings over the life of the program. In fact on all four part numbers, the total program savings was over $100,000. All those savings were accomplished in about an hour of DFM consulting. It was a great result and a very satisfying project to be a part of. It is this kind of collaborative cost savings and improvements that really make up the foundation of a strong partnership with a client and vendor.
If you have a part or parts you believe are costing too much, give us a call or send us the drawings and models to analyze for you. We’d be very happy to let you know what improvements we can propose. Send your files to dfm@procnc.com.
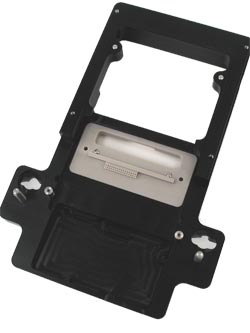
Every month we feature a really cool part that we have made. October’s Part of the Month is an assembly jig for an electronics product. This anodized aluminum machined part has some extremely tight dimensional tolerance and has a PEEK insert with 32 .015″ holes that all have a .001″ True-Position GTOL for location. A very tricky part that might be a good candidate for a case study some day.


