Last month’s newsletter was a case study showing changes that were made to a real customer part to save them money. This month we have a second case study, where we look at a part as it was originally designed, and then look at the changes that we made to make it more cost effective to machine.
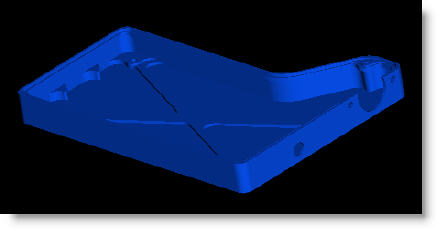
We were asked to machine this part below in Figure A. This part isn’t bad from a DFM perspective, but there were still a few opportunities to save money on this part. The first and most obvious was its overall size. The engineer designed the overall width to be exactly 4.00″, probably thinking it would save cost. We see this scenario often. Because the width tolerance of the part is +-.005″ it is not possible to use 4″ wide bar stock because the extruded aluminum tolerance at 4″ wide is +-.034″. So as designed, 5″ stock would be needed. The cost of this material and the additional machine time to remove the excess material is about $1.20 per part. In this case, the engineer had flexibility to change the size of the part and made the overall width about 0.1″ narrower, allowing the use of 4″ extruded bar stock. The overall height of this part was .58″ which is a good size allowing the use of .75″ thick material, leaving about .17″ of material to hold on to and clean up both faces. The engineer did a good job there.

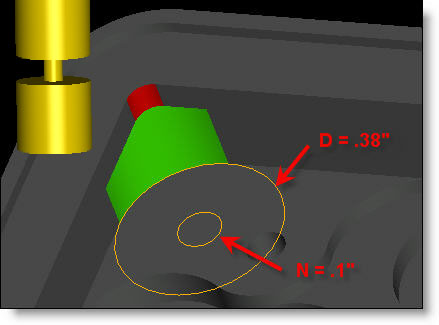
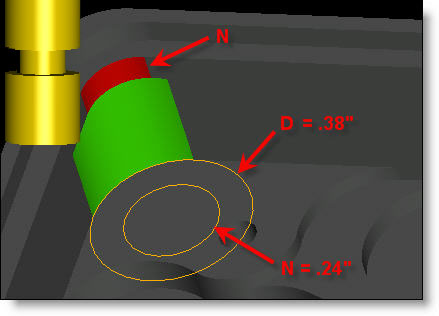
The next change that was made was to the undercut feature around the interior walls of the pocket. The ratio of the cutting diameter to the neck diameter was very poor (3.8:1), resulting in a weak cutting tool that would break easily, thus requiring a very slow feedrate and added expense in machining time. In Figure B we see the original and Figure C shows the changed radii (1.5:1). These changes were made throughout the entire pocket perimeter in several more places.


The resulting tool can easily feed 3x faster than the original, resulting in a savings of at least $3.00 per part.
The last change that was made was to the groove around the upper edge of the part. The groove was designed at .060″ wide. A standard 1/16″ endmill is .0625″ wide, and while a .0625″ groove would still be within the .005″ tolerance, it would use up half the upper tolerance. The customer opted to change the groove width to .0625″ so that the standard tool could be used to mill the slot right at the nominal width. Of course we were sure to not leave the width tolerance per the tolerance block for a 4 decimal place dimension (.xxxx = +-.001″). We had them specify that even though the dimension was 4 places, that only the standard +-.005″ tolerance applied. An alternative in this case would be to specify the groove at .063″ wide with the standard 3 place tolerance from the title block. Either solution would have cost the same savings.
So overall, we saved the customer about $5.00 per part, not a vast sum, but it was a savings of 10% of the total cost of the part. This easily met their price reduction targets that their management was pushing for without having to make sacrifices in function or squeeze margins. A win-win for both companies.
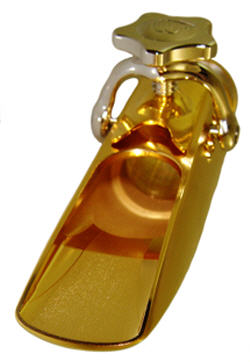
Every month we feature a really cool part that we have made. December’s Part of the Month is this gold plated Alto Saxophone Mouthpiece. This part is our own product sold under the Theo Wanne Classic Mouthpieces brand. Made from solid CNC machined brass on a 4 axis CNC mill, it has incredibly tight tolerances which turns out to be very important to achieve the best sound possible. It is then gold plated and assembled with a ligature and pressure plate.


