Last month’s newsletter discussed some of the issues specifying floor and wall radii. This month we are going to leave the topic of geometry and instead talk about material specs, sizes, and other material cost drivers.
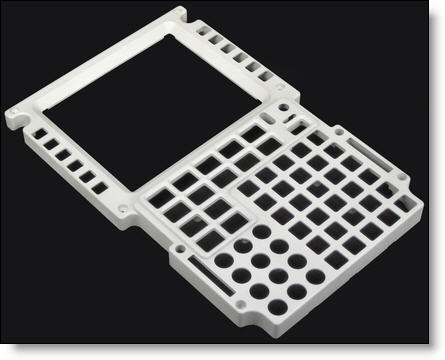
The ideal scenario for selecting a material for your parts – is to choose one that is the cheapest and most readily available that has the material properties you need. But there are some pitfalls for a task as seemingly simple as this. The first is the form that the material comes in. Let’s take an example of the part below in Fig. A. It is made from aluminum 6061-T651. This part could be made from aluminum bar stock or plate. The material properties of the two are nearly identical with the same ultimate tensile and yield strengths, and the exact chemical composition and hardness. The only difference is that the bar stock has slightly better elongation. However, plate costs about 55% more than the bar stock does – and the lead time to buy it is often longer. But we routinely see drawings where only the plate spec is listed. Often this is because the engineer isn’t familiar enough with the material specs to even know what the difference is between ASTM B221 and ASTM B209. Or it is because the company’s drawing template includes only the one spec which is included every drawing.
It isn’t uncommon to see a round part that needs to be made on a lathe with the material spec for plate; that can get expensive. The easiest way to leave this open for the manufacturer, is to not specify any standard other than the alloy and temper such as: 6061-T651, or to list a few of them like: 6061-T651 per ASTM-B221, ASTM-B211 or ASTM B208 (extruded bar, drawn bar, and plate respectively). The QQ-A specs can also be used to specify the material type. As mentioned above, the lead time to acquire plate is often longer because it requires cutting at the mill or distributor which almost always adds to the lead time.
Even if a part is thin and wide, don’t assume it needs to be made from plate. There are a wide variety of sizes of bar stock in aluminum, stainless, steel and other types of metal.

Fig. A: This part could be made from bar stock or plate.
The size and shape of your part is nearly always driven by the function. Sometimes the constraints are hard and fast but other times you have some flexibility to design the outer size and shape. There is a good opportunity to design out some cost by considering what size material the part might be made from.
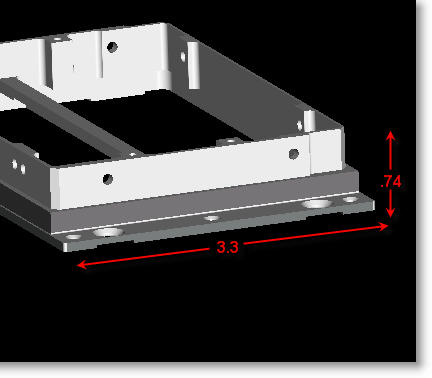
In Fig. B we see a part that is .74″ thick x 3.3″ wide. This part fits nicely into bar stock that is 3.5″ wide, but is isn’t quite thin enough to be made from .75″ material. With only .01″ clearance between the part and material we can’t guarantee the tolerances and clean up the faces. In this case, we have to use 1″ thick material which costs 25% more and spend time to remove extra material as well. If the part could have been designed at a maximum thickness of .65″ or less, it is likely that .75″ material could have been used. There are some creative methods of minimizing excess material. For smaller parts that get clamped in a vice, .05″ is probably about the minimum amount of excess that is needed. For very large flat parts that are held down with fixtures, occasionally even less can be left. If you are unsure, consult your manufacturer early on in the design phase where changes cost the least amount of money.
Occasionally, designing a part to be exactly the size of the raw material can be done if the tolerances and cosmetic requirements are very low and “stock” surface and tolerances are expected. If you need to have all sides finish-machined, a safe rule of thumb is to leave approximately .1″ on the length and width and at least .125″ on the thickness. The side the thickness would be measured along would be the one where the primary material removal is occurring. With some designs, it isn’t clear which way the part would be machined and it is prudent to engage the machine shop early on for advice on where they will need to hold onto the raw material, and how much of it they will need when they machine it.

Fig. B: This part could be cheaper if it was a little bit thinner.
There are many more topics to discuss about material and how it affects the cost and manufacturability of your parts. We will go in more depth in further issues; if you’d like a consultation, please feel free to email us at the address to the right.
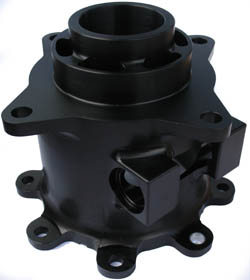
Every month we feature a really cool part that we have made recently. December’s Part of the Month is a sailboat part. If you say it doesn’t look like a part on your sailboat…then it’s probably because you don’t have a carbon fiber America’s Cup racing yacht. This part required multiple machining operations on a 4th axis, some very tight tolerances and hard anodizing with masking on critical bores. Now if we can only get a ride to do some in-field testing…


