Our last newsletter was about O-Rings. This month we are going to talk about the surface roughness callout for a recent part we made.
Generally speaking, surface roughness is called out as a maximum condition. For function and appearance reasons you would like to keep your surface more smooth than “X”. Whatever “X” might be is related to what will be interfacing with that surface, if that surface is visible in the installation, etc. For a part that has the requirement for a general nice machined look, we often see a 63µin (1.6µm) finish. Non-cosmetic aerospace parts often have a 125µin (3.2µm) finish. Parts which need a sealing surface are often called out at 16 or 32µin (.4-.8µm) finish.
We occasionally see a need for a minimum surface roughness condition. For the types of parts that we often make, that is typically related to a certain minimum roughness to allow good paint adhesion on the surface. If the surface was very smooth, the paint would not adhere as well and might flake off more easily. In these cases, it is reasonable to specify a minimum and maximum range of surface finish. Not too smooth and not too rough.
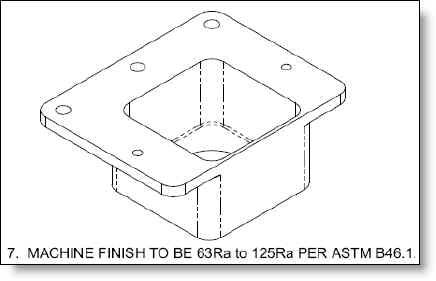
We recently machined a part that was for an aerospace application. It was an attachment bracket and was not a cosmetic part. It was not visible to the end user once installed. The drawing called out a 63Ra-125Ra finish (See Fig. A). One might think that this was a reasonable callout and it wasn’t flagged during our planning process. But after the first part was made and it was being inspected for the First Article Report, it was rejected by our inspector. Not for being too rough, but for being too smooth. The finish was measuring quite a bit better than 63µin Ra with a profilometer. Because we have had customers who would reject a part for being too smooth, and being AS9100 certified, where everything is black and white, we needed to ask about this. We asked the customer why they had specified this and they said that it was part of their standard drawing finish notes. They believed that they might pay more if it were allowed to be better. In this case, it cost them more in overhead to deal with a confusing drawing spec and have to issue an ADCN after the fact. It is unlikely that any shop would see a drawing callout for a 125Ra maximum and submit a higher bid to get the finish finer than is needed.

Figure A: Surface roughness range.
The customer decided to change the drawing to say:
Machine finish to be 125Ra or better.
We hope, but are unsure if they will change their standard drawing notes to avoid this in the future. Often those types of changes are hard to get implemented in a larger company, or any company for that matter. Too often either the people who helped specify the original requirements still feel it is needed for some reason, or more than likely the standard has been in place for years and management doesn’t see the value in expending the effort to make a change such as this. Or just as likely, they believe it is a good idea but are so short staffed that they don’t have the time to get around to it.
So be careful about how you specify requirements. Make sure you have thought through them carefully before creating a standard. A quick phone call to your favorite vendor will likely yield some good advice which will reduce the cost of your parts.
For more information about surface roughness, read our past newsletter on the topic here.
We welcome your comments below.
Every month we feature a really cool part that we have made. September’s Part of the Month is one of our very own saxophone mouthpieces that we sell under the Theo Wanne brand. This AMMA alto piece is machined from our Stable Wood with a gold plated ligature. The tolerances are very precise and the large chamber is a challenge to machine being larger than the opening on either end.


