Our last newsletter was a case study about an expensive flower vase. This month we are going to look at designing and machining thin wall sections.
I just gave another DFMA Bootcamp yesterday for a group of about 35 engineers (the third for this company! – They are really committed to reducing the cost of their machined parts). I had a great question at the end. The question was: “How thin of a wall is it practical to design and machine that doesn’t cost too much?” This is an aerospace company, so the weight of their components is an important factor. If they can design a wall thinner and it doesn’t drive cost up, then it is better for them and their customers. The good news is that most designers don’t need to worry much about this. Walls and ribs can be quite thin and are achievable without too much added cost. But we won’t leave it at that, and will go into some of the cost drivers for this type of geometry.

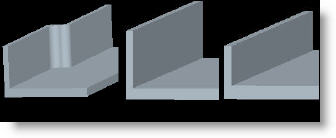
Figure A: Different thin wall configurations.
Like many questions regarding DFMA there are myriad factors at play, including:
- Height of the wall
- Geometry of the wall (is it straight or have jogs?)
- The machine that is being used
- How long the wall is
- Material
All of these factors are important, but none probably as much as the height of the wall. Just like the L:D ratio we have talked about so much with endmills, at the extremes, the Height:Thickness (H:T) ratio of a machined wall or rib will play an important roll in its cost. Too tall and thin and the wall will tend to deflect away from the cutter, making it hard to hold the tolerance and also potentially causing poor surface finish as a thin wall will be more likely to chatter. Although if you are under a ratio of 10:1, you shouldn’t be adding cost to your parts and it should be easy to hold a +-.005″ tolerance.
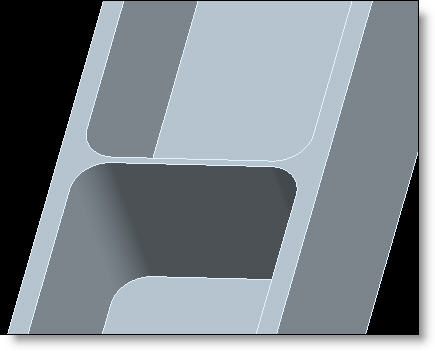
Similar to height, a long thin wall may exhibit more challenges than a wall that is not long. It will not be as supported by geometry on either end. This is also basically the same factor as the geometry of the wall. If the wall has curves, jogs, T’s or corners in it, all that geometry will help to stiffen the straight section and make it less prone to deflection and chatter. A relatively short rib (see fig 2) can be made with very high H:L ratios – perhaps even 30:1 without affecting cost greatly.

Figure B:Tall thin rib at 30:1 H:T ratio.
The type of machine that is being used and the programming method also are important factors to minimize cost. Although these are completely out of the hands of the designer. Machines which have higher RPM are able to machine thin sections with less trouble because tool pressure can be lower. Similarly, there are programming methods that can be employed to make machining thin walls less problematic. One is to machine the same Z-depth on both sides of the wall so that the material below on both sides is helping to support the wall. This is often called waterline machining. The alternative is to remove all the material from one side of the wall and then remove it all from the other side. Using this method will generally cause more problems with a thin wall as it isn’t supported on the back side of the cut and is more likely to chatter.
If your part isn’t cosmetic at all and you don’t mind some chatter left in the finish you can let your shop know this and they won’t have to spend time trying to optimize it. Although I would say this isn’t the most desirable solution as most machinists have pride in their work and don’t want to create parts with chatter on them.
As always, we will suggest that you talk to your manufacturer to see what their thoughts are on this topic. They can tell you best what they are comfortable with and what they consider to be cost drivers.
We welcome your comments below.
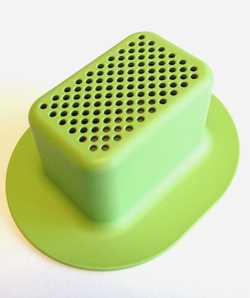
Every month we feature a really cool part that we have made. November’s Part of the Month is a small grill used in an aerospace application. This part has pretty thin walls over 20:1, but because they are so well supported by each other, they really weren’t a cost driver.


