Our last newsletter was about designing and machining thin floors. This month we are going to revisit a past topic about undimensioned features on drawings.
We recently had a customer who was considering a change to their drawing note about undimensioned features on their minimally dimensioned drawing template. They had read our newsletter from back in May 2009 and thought that it was good enough advice that they were going to change their drawing standard to save money. This would have been a pretty big change for a reasonably large company with about 700 people and not a decision to be taken lightly. The engineer who was interested in this change ran it by the head of their QA department who had some concerns that it was not a good idea. He had some very good points that I had not considered when I wrote that newsletter. It made me realize that I need to be very careful with the advice I gave as there are real implications for companies who might actually make major changes based on our advice. This is more significant than a design engineer improving the machinability of a machined part. The content of our newsletters is focused strictly on CNC machined parts because that is our area of expertise. Our customer has all sorts of parts made that are not CNC machined – sheet metal, molded, composite, etc. There is also a good possibility that even parts intended for CNC machining will have some features machined on manual equipment where you are not relying on the CAM system to drive your tools off of the 3D model. This wasn’t a situation I had really considered when writing that article.

Figure A: Note about undimensioned features.
There are some other interesting factors at play here as well. In Figure A you can see what their drawing standard says. The tolerance on undimensioned features is quite generous at .03″, which is nice and easy. So for a CNC machined part, it is highly likely that all the features will be well within tolerance when programmed off the 3D model. At Pro CNC, our in-process-inspection requirements specify that we check a minimum of 10% of the parts on at least one dimension affected by the diameter and length of every tool as well as dimensions that might be affected by the operator loading the raw material into the part. So it is virtually guaranteed that our parts will be well within their tolerance. But theoretically that doesn’t matter. According to the ISO-9000 and certainly AS9100 standard, every attribute on the drawing needs to be checked and guaranteed to be conforming. An auditor can demand that the company show proof that the entire part was within that .030″ tolerance. If the company can’t demonstrate conformance, that will be a finding against it. But our customer has also done something that I believe is really smart. The note says “appropriate manufacturing methodology shall be utilized to verify compliance”. The way I read this, it leaves it open for the shop to demonstrate to an auditor that they used a method to verify compliance that was less expensive than probing 100% of the part on a CMM – if it becomes an issue with an auditor.
Thankfully, we live in the real world, and not all auditors and quality managers are so black and white. Even the quality manager at our customer said “I do not expect that our suppliers are actually doing a 100% inspection of any kind against the feature requirements of the model as it is.” So even though the drawing spells out the requirement, the customer isn’t expecting that vendors are necessarily doing it – and they have included the note opening up the method of verifying compliance. In many ways, this is a good thing from a cost perspective. They aren’t driving costs up by insisting vendors prove they have met this requirement in an expensive way. So given this, perhaps it is best to not change their drawing template. If they have a poor performing supplier who delivers bad parts, they will have this requirement to fall back on, and they aren’t driving costs up by insisting on proof of conformance of the undimensioned features.
As always, we recommend discussing these types of issues with your shop to see what their perspective is, and if your drawing notes are driving costs for them and you.
So what is your company doing? Are you driving costs up that may not be needed? We would love to hear your comments below.
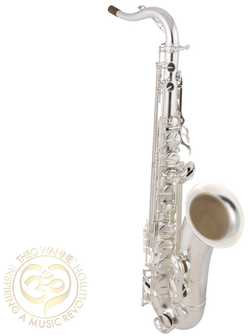
Every month we feature a really cool part that we have made. February’s Part of the Month is our very own Mantra Saxophone. After over 2 years of design and development we have launched the most innovative saxophone ever built. With dozens of never-before-seen features on any saxophone in history, and lots of cool precision machined pieces, this saxophone truly sets the bar for all other manufacturers. You can check it out and even buy one here.


